Updated on 27th March 2021
Google Slides is a freely available presentation tool that is already used by millions of people all over the world.
It provides a fast and effortless way to create compelling presentations right from our browser (or app). Without the hassle of installing third-party applications, you can easily work on Google Slides to draft your next presentation. It can also help you collaborate with your team and work on a presentation together.
If you are already using Google Slides, then you must be aware of its numerous advantages. Though, there are a few tips and tricks that even the most committed users of G Slides are not aware of.
For instance, did you know you can edit videos on Google Slides or can even dictate a presentation note?
Read on and be familiar with all the remarkable tips and tricks of Google Slides and be a pro in no time!
1. Use Master Slides to Save Your Time
Too many times, we wish to implement a change in all the slides without visiting them individually. This is exactly where Master Slides can help us. Simply go to the View > Master option to access it.
In this way, you would be able to edit all the slides simultaneously. From changing the background to adding the company logo – simply make an edit on the Master Slide and it will automatically be reflected in the entire presentation. You can learn more about Master Slides in this stepwise video tutorial.
2. Start Dictating Your Text
If you have a working microphone on your computer, then you can easily dictate presentation text or notes as well.
Go to Tools >“Voice type speaker notes” to access this feature. This will display a Microphone icon on the screen. Simply click on it to activate the Microphone on your system and start speaking. Whatever you will narrate will automatically be added as the presentation note. Once you are done, close the icon.
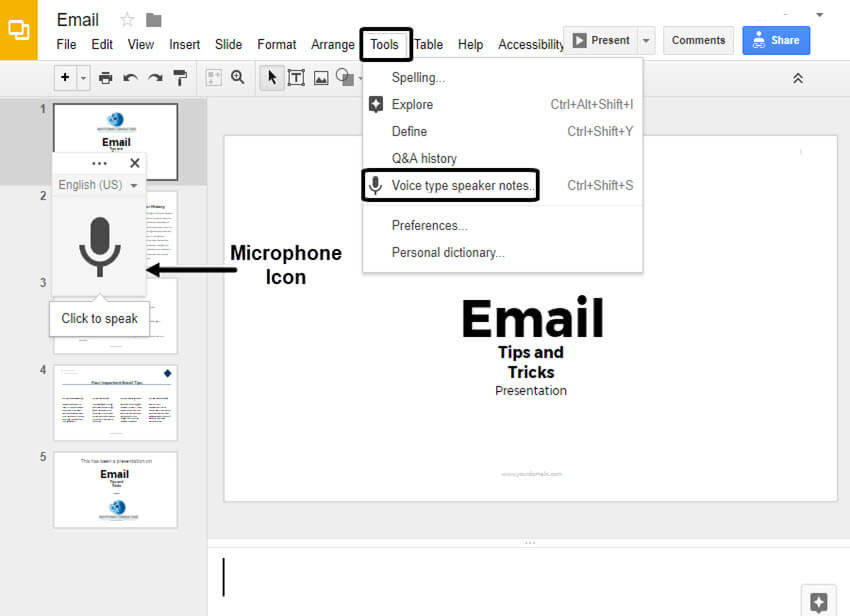
This feature will help you multitask and provide real-time feedback regarding the presentation.
Note: This feature is only available in Chrome browser.
3. Integrate Google Slides with Chromecast
Google Slides also provides a quick and easy way to be integrated with Chromecast using the Google Home app. You can download Google Home on your Android device from here or on your iOS device from here.
Afterward, launch the app and connect your smartphone to the Chromecast device. In this way, you would be able to share your screen with the display. Without including any unwanted cable or wire, you can give your next presentation.
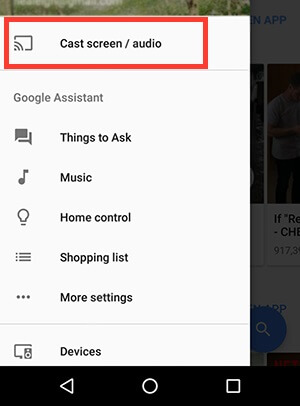
Make sure that your phone is on the Airplane Mode beforehand to avoid any unwanted pop-up or notification while your screen is getting shared with your audience.
4. Do More with Images
If you want to make your presentations more appealing, then you need to take the assistance of some visual aids. Thankfully, Google Slides has tons of features to use images.
You can easily use an image as a background for your slides. Besides that, you can also crop it or add borders to the image to make it stand out. G Slides also has a feature for image masking that can be used to put the selected image in the shape of your choice. You can watch this quick tutorial to learn these tricks.
5. Add Sound to Your Presentations
Most of the people already know how to add images to Google Slides. Though, adding an audio to your slide might be a little tricky. There is no option to “Insert” an audio the way you can insert an image or a text box. Nevertheless, the solution is pretty simple.
Just copy the YouTube link of the audio you wish to add (or the link of any streaming service like Spotify, Apple Music, and more). Later, you can paste the link on the slide and hide it if you want to. This will automatically play the sound in the background. You can learn how to do it in this video.
6. Collaborate with Other Users
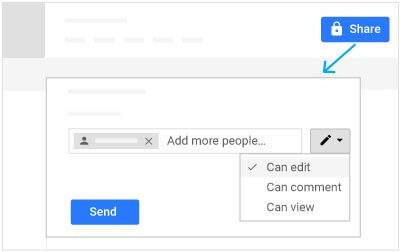
This is one of the most evident benefits of Google Slides. Unlike any other desktop software, you can easily share the Google Slide you are working on with others. This can help users to collaborate together and work on a document in a better way. Simply click on the “Share” button to do it.
You can either share the Google Slide with other users via its URL or by sending them invitations. Simply provide the email id of the collaborator, set privileges, and send them an invite to do it.
 7. Maintain Your Personal Dictionary
 7. Maintain Your Personal Dictionary
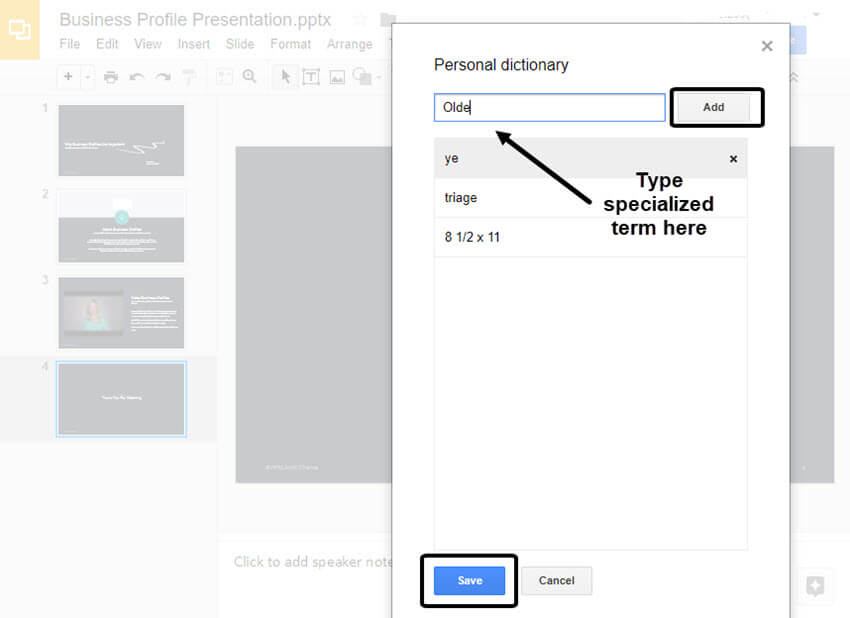
Even though Google Slides has an inbuilt spell-checker, it is far from perfect. Chances are that it might miss brand names, places, key terms, and more. Therefore, you can maintain your own dictionary and include these terms. Simply go to the Tools menu to access the Personal Dictionary feature. Here, you can add the words of your choice.
 8. Create a Drop Shadow of the Text
 8. Create a Drop Shadow of the Text
If you want to take a step-up from the basic formatting tips of text in Google Slides, then try to add a false drop shadow effect. To do this, you need to copy and paste the same text box adjacent to each other. Now, change the color of both the texts and adjust them in the right way to form a shadow-like effect. You can view it in practice right here.
9. Publish Your Presentation to the Web
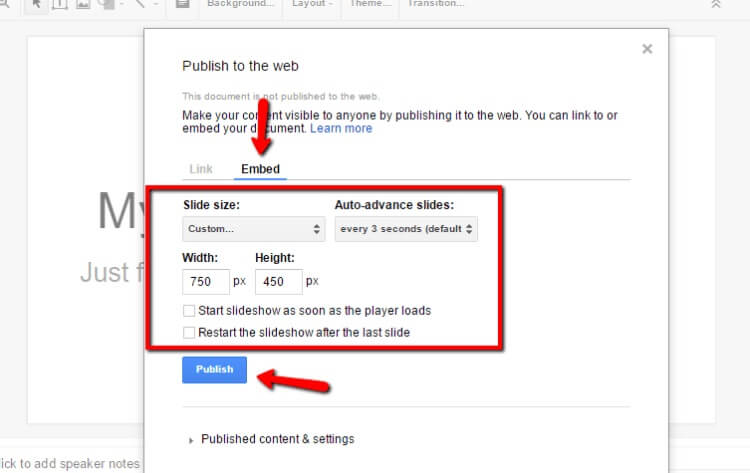
If you like to share your Google Slide with someone who doesn’t have a Google account or would like to embed the slideshow in another web page, then this would be an ideal solution. Just go to the “File” menu and click on the “Publish to the web” button.
The interface will have two options. Under the “Link” tab, you can edit how the slideshow progresses when shared with someone else. It is mostly used to share the document with others (without inviting them via their email id).
If you wish to embed the slideshow in another web page, then click on the “Embed” tab. From here, you can alter its size, progress, and more.
10. Restore Previous Versions of the Presentation
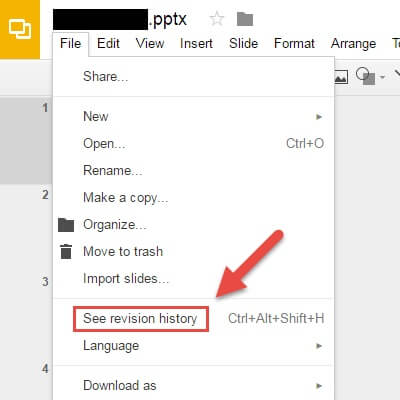
A lot of users assume that since Google Slides is all about saving the content on a real-time basis, they can’t access a previous version. Don’t worry! You can easily restore an earlier version of the document without any hassle. Just go to the File > See Revision History option. This will provide a list of all the latest revisions made to the file. Simply select the one you wish to restore to launch it.
11. Update Your Slides on a Real-time Basis
If you want to provide up-to-date statistics to your audience while presenting, then you should definitely use this feature. You can insert a chart from Google Sheets by visiting Insert > Charts > From Sheets option. While selecting the chart, make sure the “Link to Spreadsheet” feature is enabled.
Afterward, you can arrange the chart the way you like and click on the “Update” button. This will automatically reflect the changes made on the original Sheet. Therefore, if you are representing data that is being constantly modified, then this feature will certainly be a life-saver.
Here’s a quick tutorial from G Suite to teach you the same in a stepwise manner.
12. Editing a Video
Google Slides also provides a fast and hassle-free way to edit videos in its native interface. Instead of editing a video in another tool and later adding it to your document, you can do it all in one place. Simply insert the video of your choice, right-click it, and go to the “Video Options”.
This will launch different Video Options on the right panel. From here, you can easily trim the video, mute it, and make other changes. While the tool doesn’t provide a lot of options, it can certainly save your time while drafting an interactive presentation. You can learn how to do it in this tutorial as well.
13. Link Your Slides
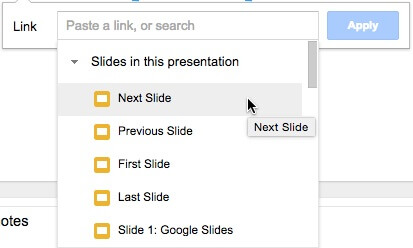
It is quite easy to create a hyperlink in Google Slides. Though, you can also link different slides as well. If you are working on an extensive presentation, then this can help you jump from one slide to another pretty easily.
Simply insert a link and choose to link “Slides in the presentation”. From here, you can select the slide you wish to link.
14. Make the Q&A Session a Winner
The Q&A session is often considered the most mundane part of any presentation. With this advanced tool, you can certainly change that. The Slides Q&A tool can make the session fun, interactive, and time-saving. By sharing a link with your audience, you can automate the entire process. They can simply go to the URL and submit their questions. It also allows them to ask anonymous questions as well.
Later, you can go to the Presenter view to access these questions. Your audience can even vote up or down a question as well. If you think it’s complicated, then you can learn how to implement it in this tutorial.
15. Import and Export Files
Unlike other applications, Google Slides allows a seamless way to import and export documents to and from different formats. For instance, if you already have a PowerPoint presentation and would like to edit it on Google Slides, then go to File > Import option. Select the presentation you wish to edit and launch it. Though, you should review your content as there would be a change in its overall formatting.
Similarly, you can export the document in the format of your choice as well. Go to the File > “Download As” option. From here, you can export the presentation as PPT, PDF, ODP, and other formats.
16. Use Readily Available Templates
If you wish to stand out from the crowd while drafting a visually stunning presentation, then you should take the assistance of Google Slides templates. The tool supports readily available templates that can easily be loaded. Later, you can customize these slides and come up with a final presentation in less time. SketchBubble also has a wide variety of Google Slides templates that can help you step-up your game by drafting stunning presentations.
Some More Useful Tips
17. Move Slides between Different Presentations
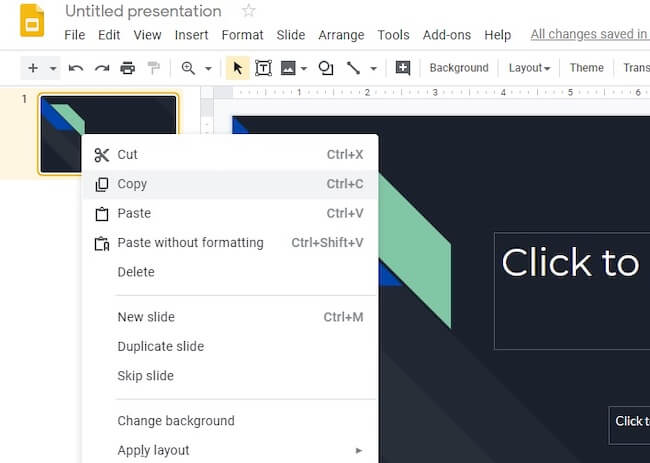
This is one of the easiest things to do in Google Slides that would certainly save your resources. Too many times, we wish to copy the content of one slide and paste it on another. To do this, just open the first presentation and select a slide. Now, press Ctrl + C keys or right-click and select the “Copy” option. Later, go to the second presentation and press the Ctrl + V keys or right-click > Paste to successfully move the entire slide.
Alternatively, you can also link the copied slide. If you make any changes in the original slide, it will be reflected in the other slide with just a click. You will find an option “update” in the copied slide.
18. Explore More Fonts and Format Options
When Google Slides was initially released, it only had basic formatting options. This was all changed with the subsequent updates of the application. Now, it offers tons of formatting styles and options that you can easily explore. For instance, if you wish to access more fonts, then just go to the Fonts feature on the toolbar and click on “More Fonts”. This will launch a dedicated pop-up from where you can explore hundreds of readily available fonts.

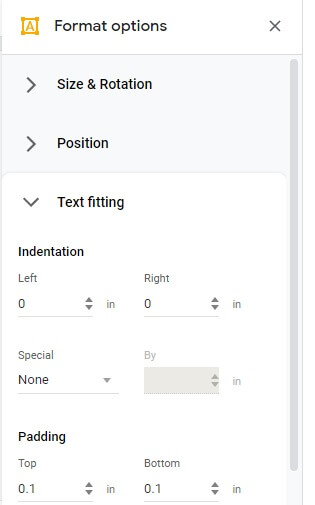
Furthermore, you can even try several formatting options for these Google Slides design tips. Just click on the Format > Format Option on the menu bar. From here, you can set filters on the text, lock aspect ratios, add reflection, and do so much more.
19. Do More with Keyboard Shortcuts
From text formatting to editing and navigation to selection, there is almost everything you can do with keyboard shortcuts on Google Slides. With these Google Slides tricks, you can not only impress others, but would also save your time. To get to know more about it, just visit Help > Keyboard Shortcuts feature. This will display a list of all the keyboard shortcuts supported by Google Slides so that you can make the most of your time.

20. Add GIFs and Animations to Your Slides
If you want to make your presentations interesting, then consider adding more visually appealing and unique content to it. For instance, GIFs have been in the current trends and they will certainly make even a mundane topic interesting. To explore this, just go to the Insert tab on the Menu bar and choose to insert images. This will let you add GIFs from your local system, the web, or even Google Drive.
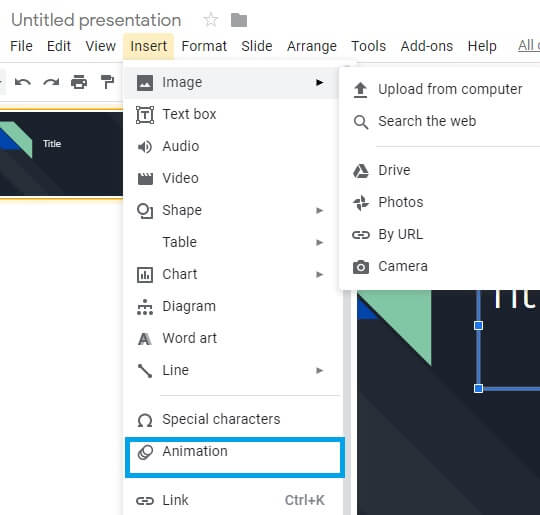
Apart from that, you can also animate any existing component (even a text box) to explore these Google Slides design tips. Just go to Insert > Animation and select an object you wish to animate to explore the available options.
21. Set Automatic Timing to Your Slideshow
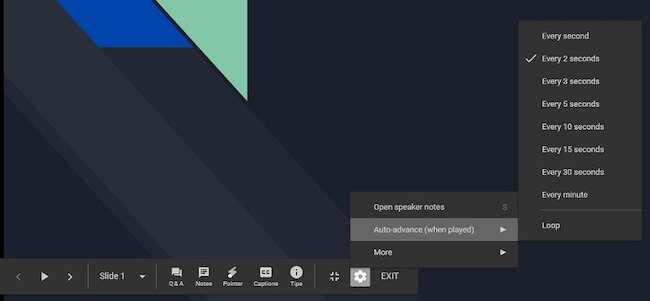
Do you wish to give a presentation that people would remember for a long time? With the help of the auto-advance option of Google Slides, you can certainly do the same and impress your audience. Ideally, Google Slides will let you set a restricted duration for every slide (from one second to 30 minutes). To enable this, go to File > Publish on the Web and under the “Auto-advance Slides” option, mark a suitable transition duration.
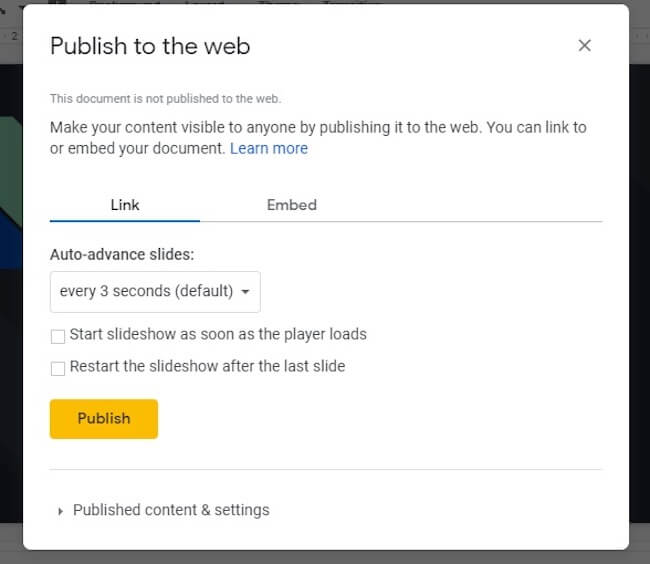
After that, you can just publish your presentation on the web and play it whenever you want. Once the slideshow is started, every slide would be automatically advanced after the selected duration. Though, it is highly recommended to practice your timing beforehand so that you can ace your presentation.
Alternatively, you can also get this option while presenting the slides as well. Click on the “Present” button to start the slideshow and go to its settings from the bottom panel. Here, you can go to the auto-advance option and select the preferred timing.
22. Explore Other Languages
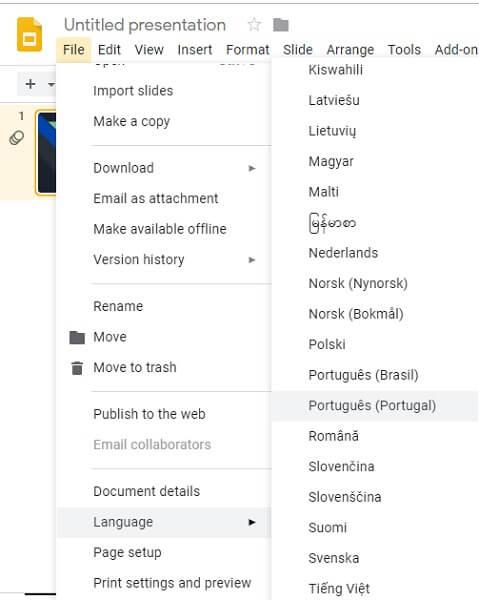
Not an English speaker? Don’t worry! Google supports almost a hundred different languages as well that you can explore on Google Slides. In this way, you can easily draft engaging presentations in the language of your choice and target your audience. Just go to the File menu > Languages and select your preferred option from here.
23. Turn Your Cursor into a Laser Pointer
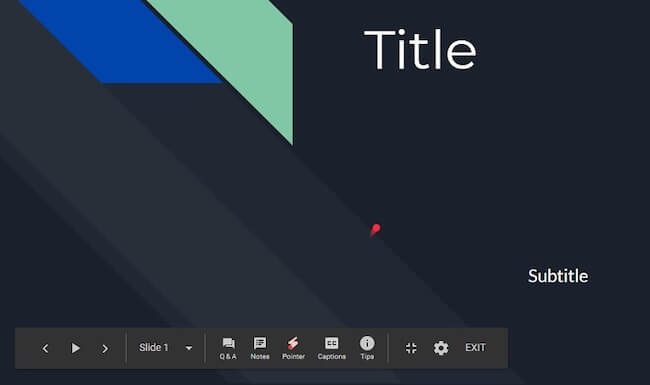
Yes, you have read it right! Using this interesting Google Slides trick, you can turn your mouse cursor to a laser pointer. In this way, you can focus on certain objects on the slide without actually using a laser pointer. To do this, just click on the “Present” option at the top to start the slideshow. Now, go to the bottom panel with all the available features and click on the “Pointer” field to turn your mouse cursor into a red laser-like pointer. Later, you can click on the same button again to disable it.
24. Make the Most of Dynamic Transitions
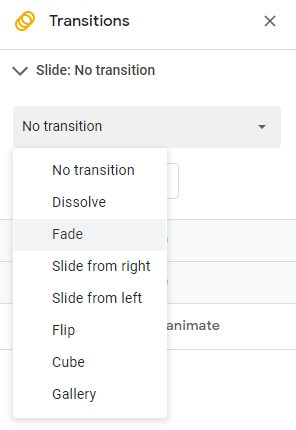
Sometimes, it can be a tedious job to make standard presentations more interesting. Even if you are running short on time, you can take the assistance of the transition feature and explore Google Slides design tips. It will let you add all kinds of transitions to your content like fade-in, fade-out, flip, cube, dissolve, and so on. You can go to the Slide option on the main menu and visit the transitions feature to explore it.
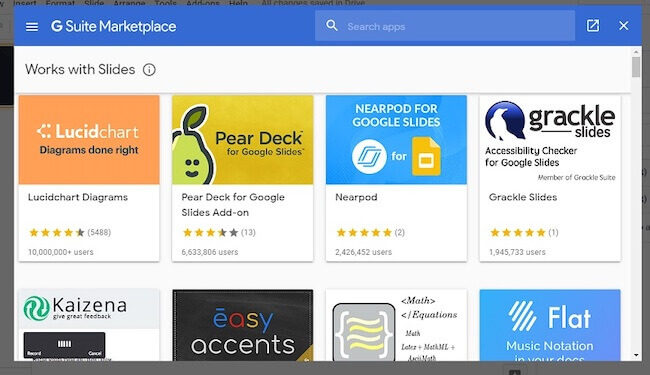
25. Get G-Suite Add-ons
If you are looking for additional features and more Google Slides tips that are presently not available on the native interface, then explore G-Suite Add-ons. To get them, just go to the “Add-ons” tab on the Main Menu. Here, you can see a list of the existing add-ons and explore more options as well. You can also open the G-Suite Marketplace to include different kinds of add-ons to your application. For instance, you can add mathematical formulae, professional charts, animations, and so much more.
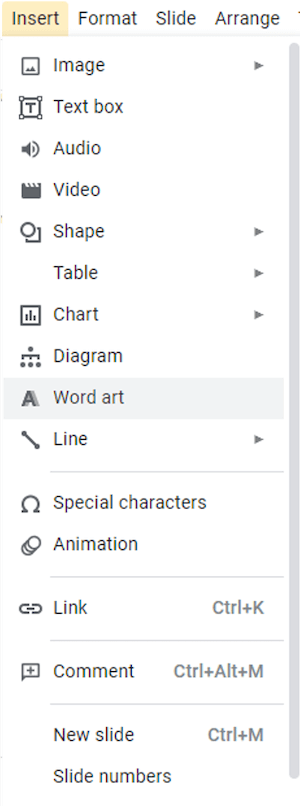
26. Convert Text into Word Art
You can highlight your text by converting it into Word Art. For this, you need to go to Insert > Word Art. Then, add the desired text and press Enter on the keyboard. The best part is, just like normal text, you can easily change the size, color, and font of the Word Art.
27. Wireless Streaming to the Big Screen
Google Slides stream support for iOS and Android is provided via AirPlay and Chromecast. For using this new feature, open your presentation in Google Slides, go near a Chromecast device, and press the cast button. It will show up your presentation on the big screen. Now you can leverage the built-in timer to track your pace, view speaker notes, and do much more using your tablet or smartphone.
Learn more about this feature here:
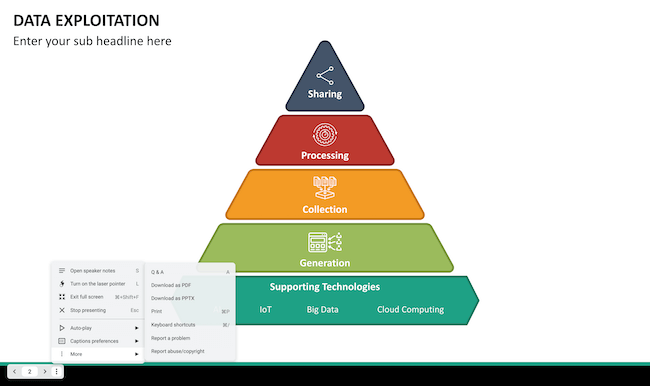
28. Offer a Less Intrusive Experience with the New Presenter Bar
Google Slides has replaced that long dark gray strip in the presenter toolbar with a shorter and light-colored background strip. Only four buttons have been provided in the toolbar; other options have been included in the three-dot overflow menu. Further, to prevent the presenter bar from impeding the content, the size of the trigger zone has been reduced.
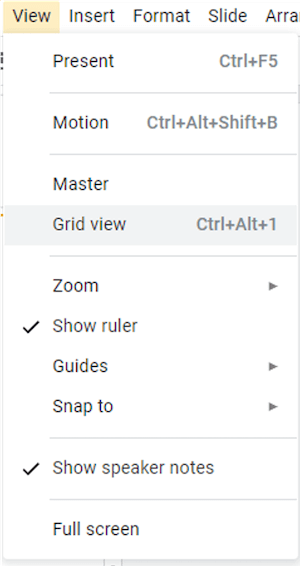
29. See Your Slides in a Grid View
Now you can see all the slides of your presentation in the Grid view. This view enables you to choose the slides easily, reorder them by dragging and dropping, and cut/copy/paste them. To toggle on/off the Grid view, go to View > Grid. You can also use Ctrl+Alt+1 (Keyboard Shortcut) or the small icon at the bottom left of the page.
30. Print Your Google Slides Presentation
Once you have finished the presentation, you can print out the slides. Go to File > Print. Before printing, you can do settings related to pages, copies, color, paper size, etc.
If you don’t want to print the slides on paper and save them as a PDF file, click the “Destination” drop down menu on the Print screen and select the “Save as PDF” option.
I’m sure that after getting to know about these amazing Google Slides tricks, you would certainly be excited to give them a try. Go ahead and implement them while working on your next presentation. If you also have a secret tip regarding Google Slides that you like to share with the rest of us, then feel free to drop a comment below.