A calendar is a perfect tool for staying organized and connected. It helps mark due dates, keep track of meetings, events, projects, etc. Using a calendar, you can also plan your workdays. This way, you can stay organized for the entire year without missing deadlines, work anniversaries, birthdays, or other important dates.
You can also insert a calendar in your Google Slides presentation to inform your audience about important events. If you don’t know how to do this, don’t worry! We have brought you this tutorial to help you create a calendar in Google Slides and keep your audience informed.
So, here we go!
Create a Calendar in Google Slides
Step 1: Open a new presentation in Google Slides.
You can either create the calendar to the full size of a slide or as required and then add relevant information to the rest of the slide.
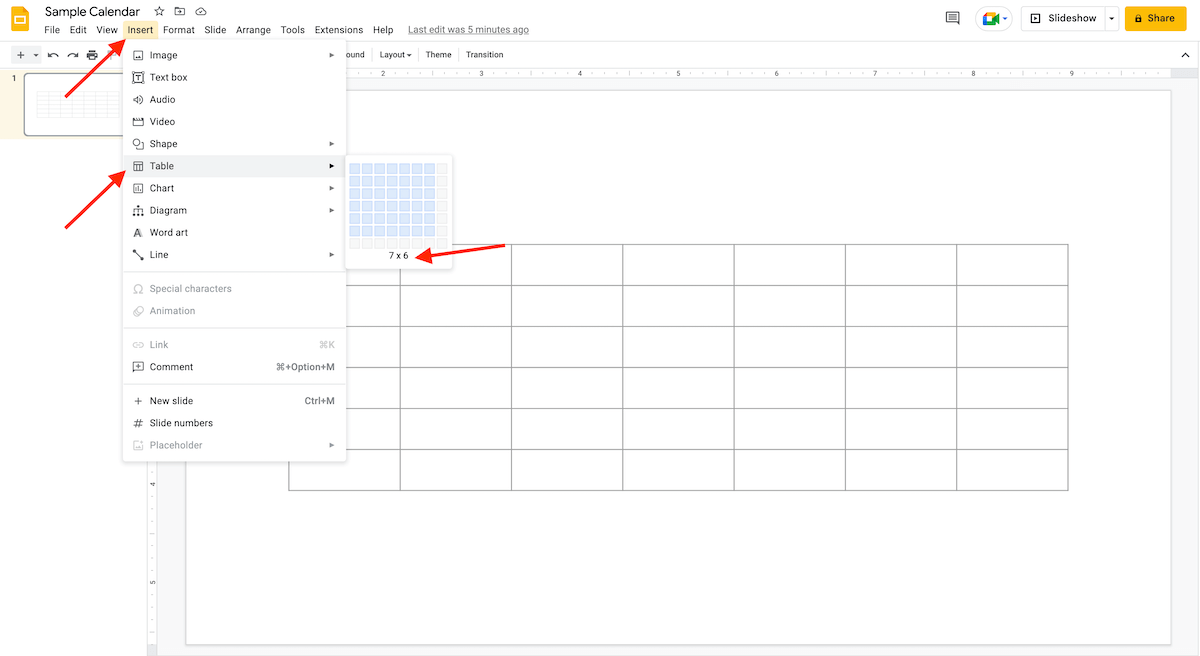
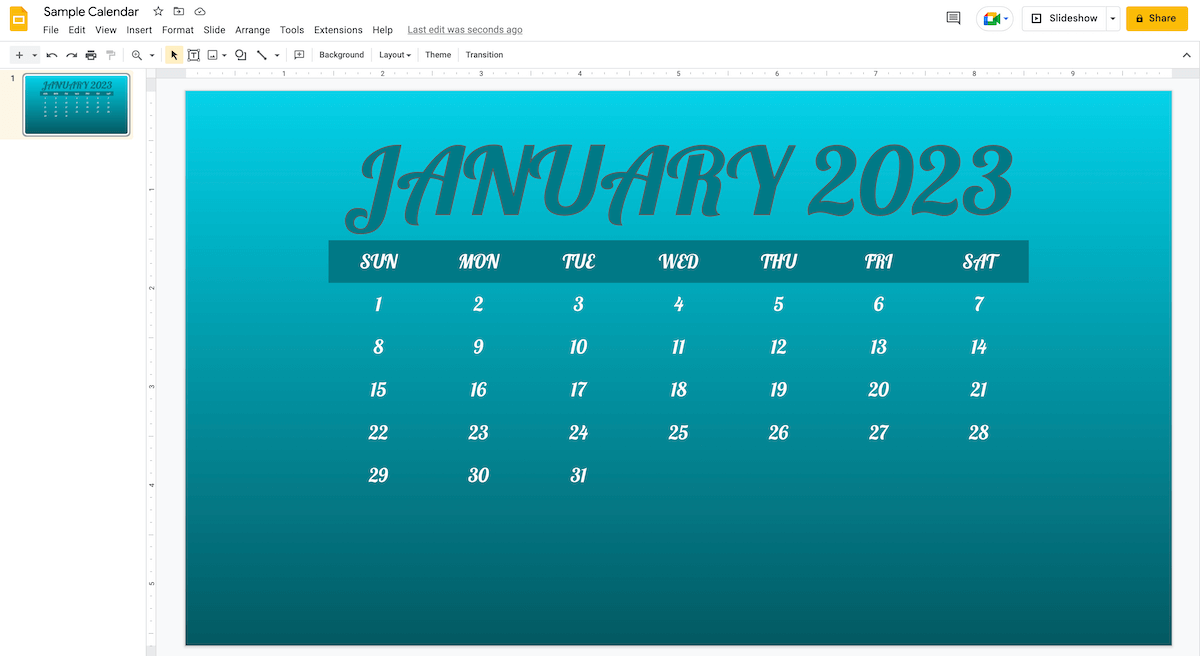
Step 2: Add a table to the slide to design a structure for your calendar. We have selected a seven-row and six-column table here. Don’t forget to adjust the boxes according to the month for your calendar.
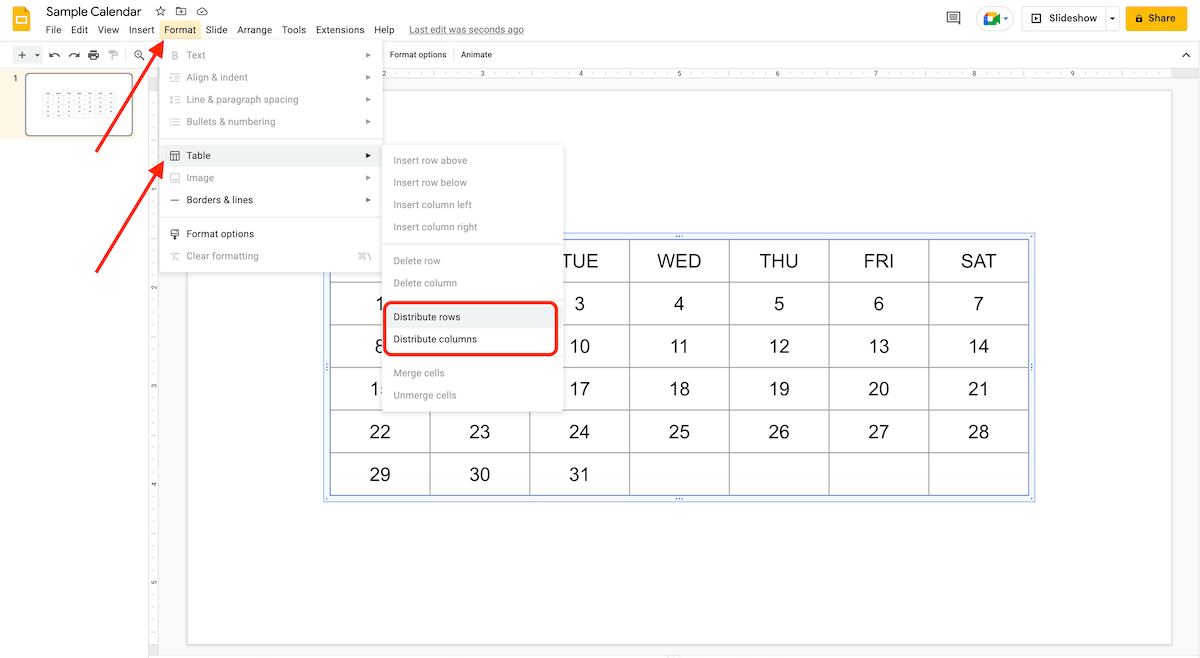
Step 3: Insert the days’ names into the calendar structure. Then, adjust the table size according to your preferences.

Step 4: Use the command Format > Table > Distribute Rows/Columns to arrange the rows and columns and ensure an even space between them. Select the entire table to apply the changes in all rows and columns.
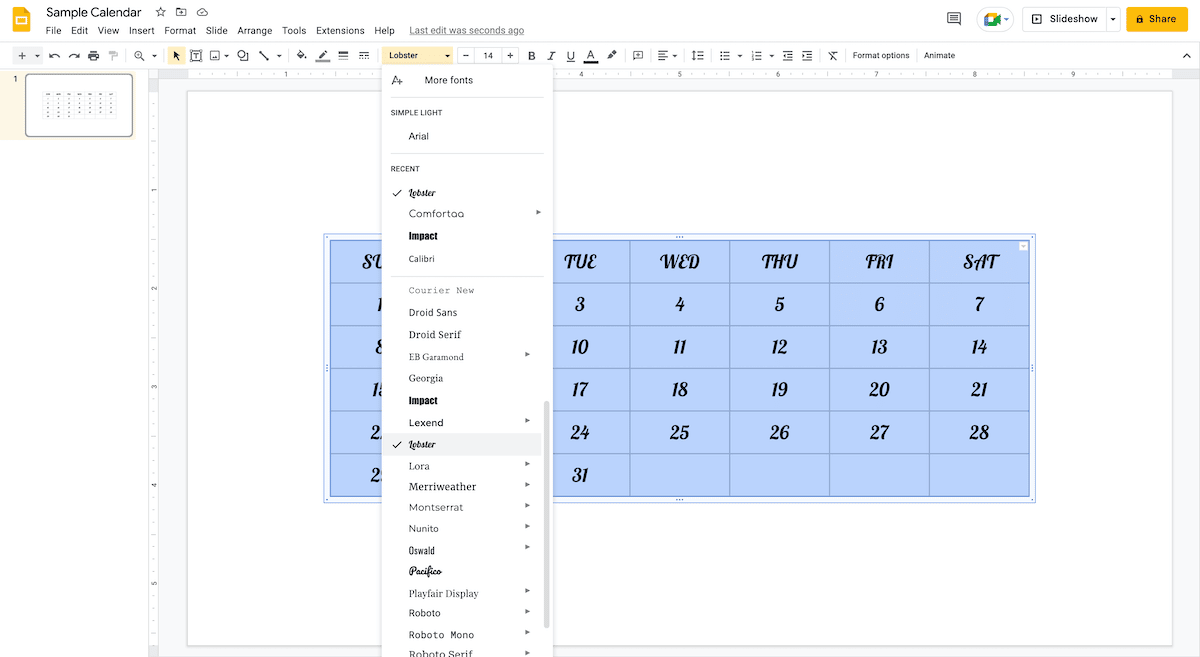
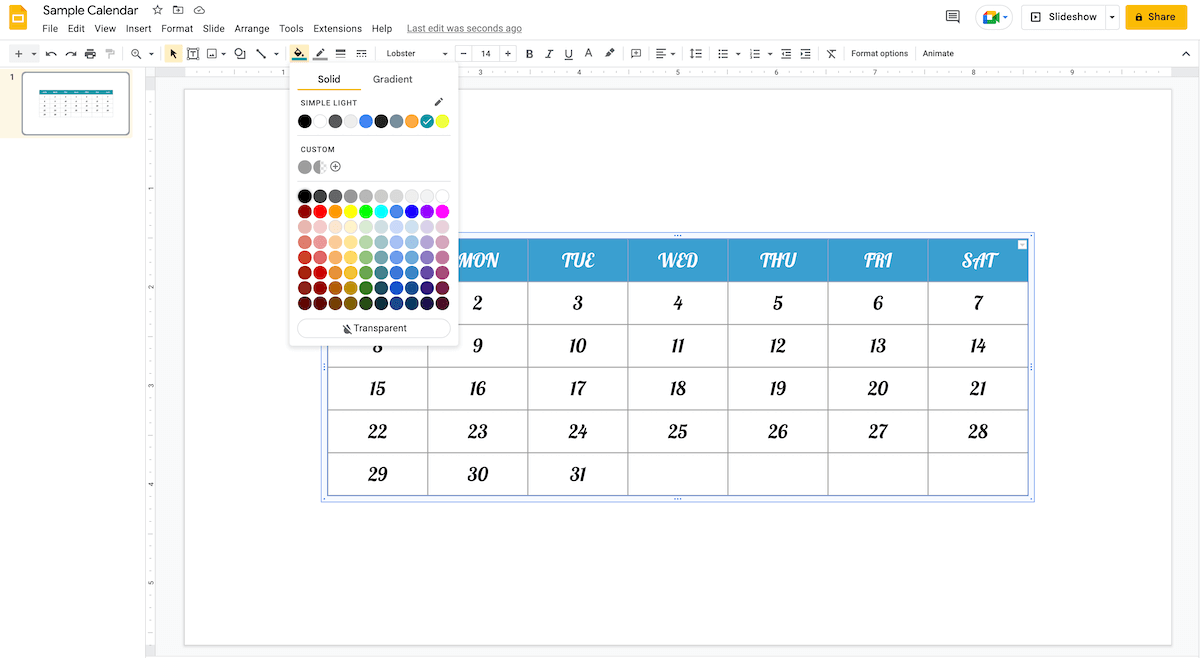
Step 4: You can format the calendar according to your liking by changing the font color, filling in the colors in the cells, etc.
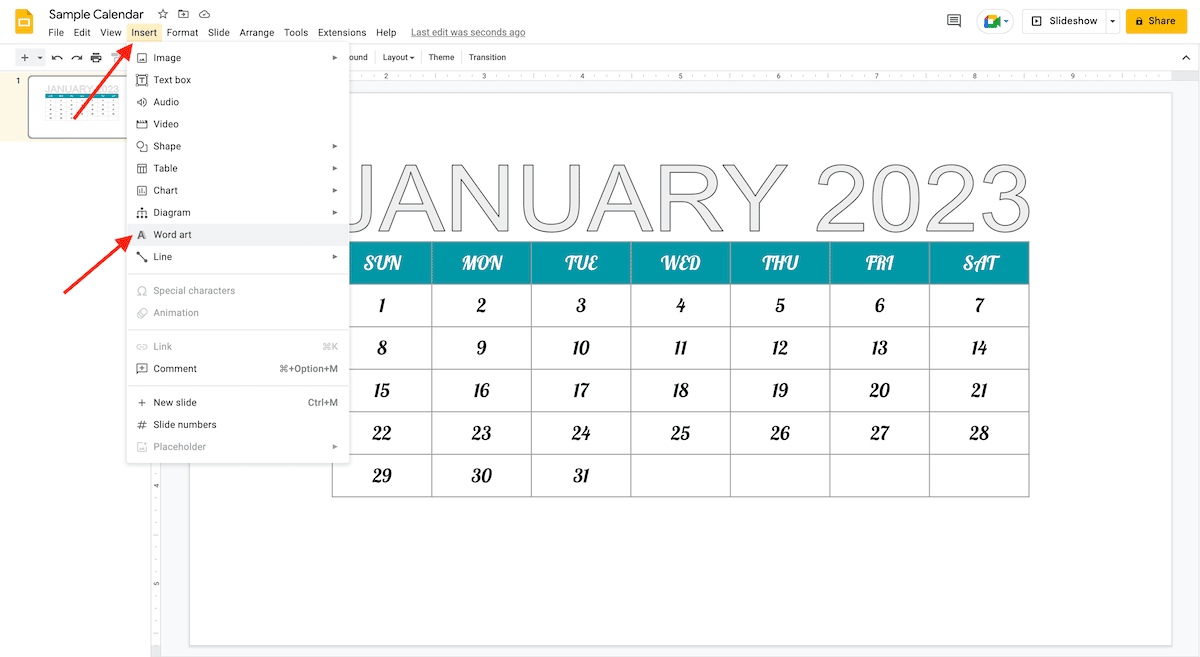
Step 5: To give a month name to your calendar, insert a row above the table or you can also create a separate text box or even create a WordArt text and place it at the top of the calendar. In this tutorial, we have selected WordArt text for two reasons: first, inserting it is very simple, and second, it looks appealing. You can insert the WordArt by clicking on Insert > WordArt. You can then alter the font size, color, and style as needed.
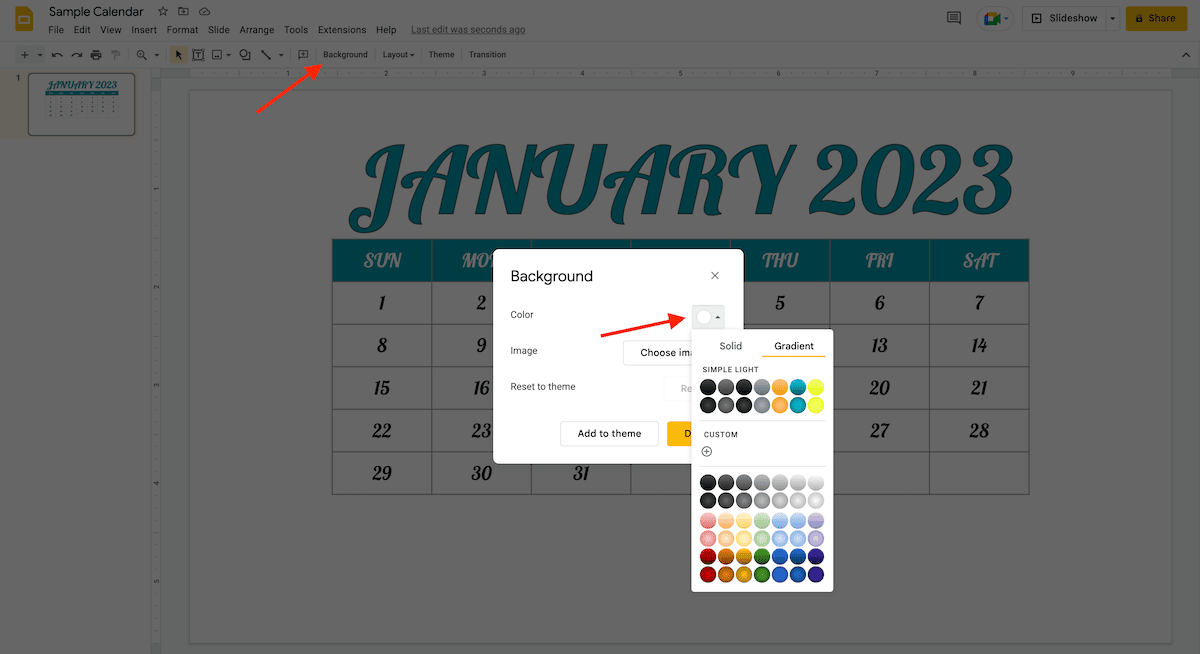
Step 6: Additionally, you can change the background of your calendar. To do so, select the Background from the top menu; it will open a pop-up window from which you can add a color or an image from the device, as shown in the GIF below.
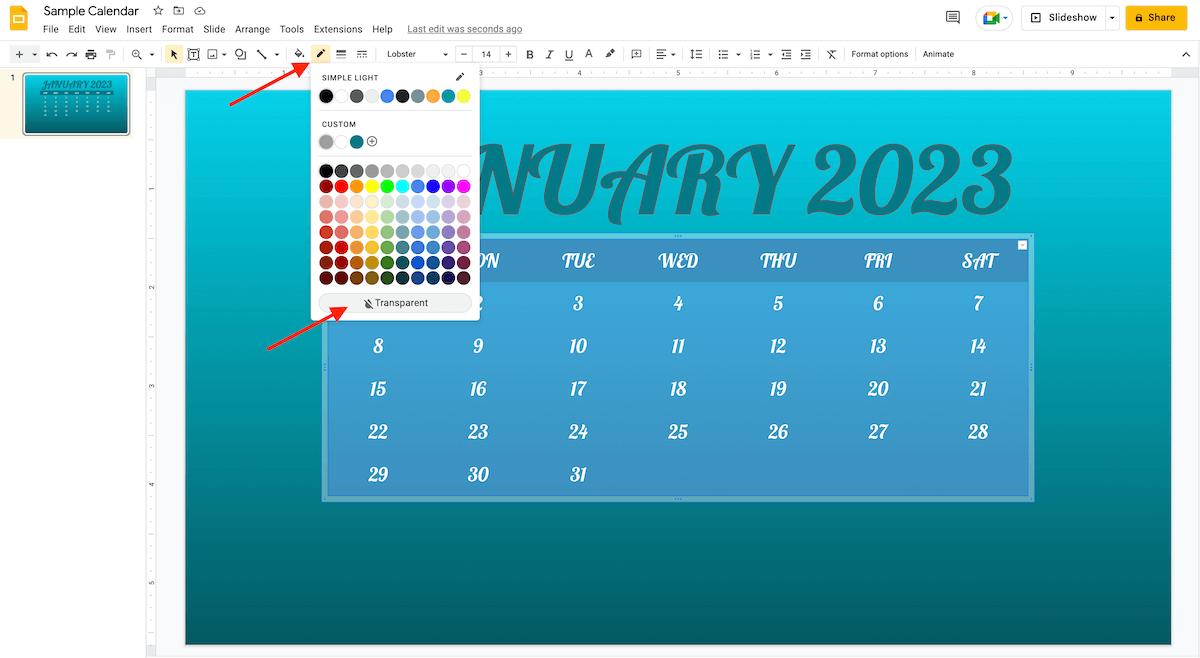
Step 7: To match the background, make the borders of the calendar structure transparent.
And that’s it! Following this easy process, you can quickly design an entirely customizable calendar in Google Slides. However, if you don’t have much time to craft a calendar from scratch, you can count on SketchBubble! It has an amazing collection of calendars from which you can choose as per your requirements.