
Applying filters to your Google Slides images requires an advanced skill level but is easy to do. It helps you make your presentation more dynamic and memorable. This tutorial will teach you how to apply effects to an image in Google Slides through simple steps. Let’s begin!
Recoloring an Image
Step 1 – Head over to your Google Slides presentation and select the image you want to modify.
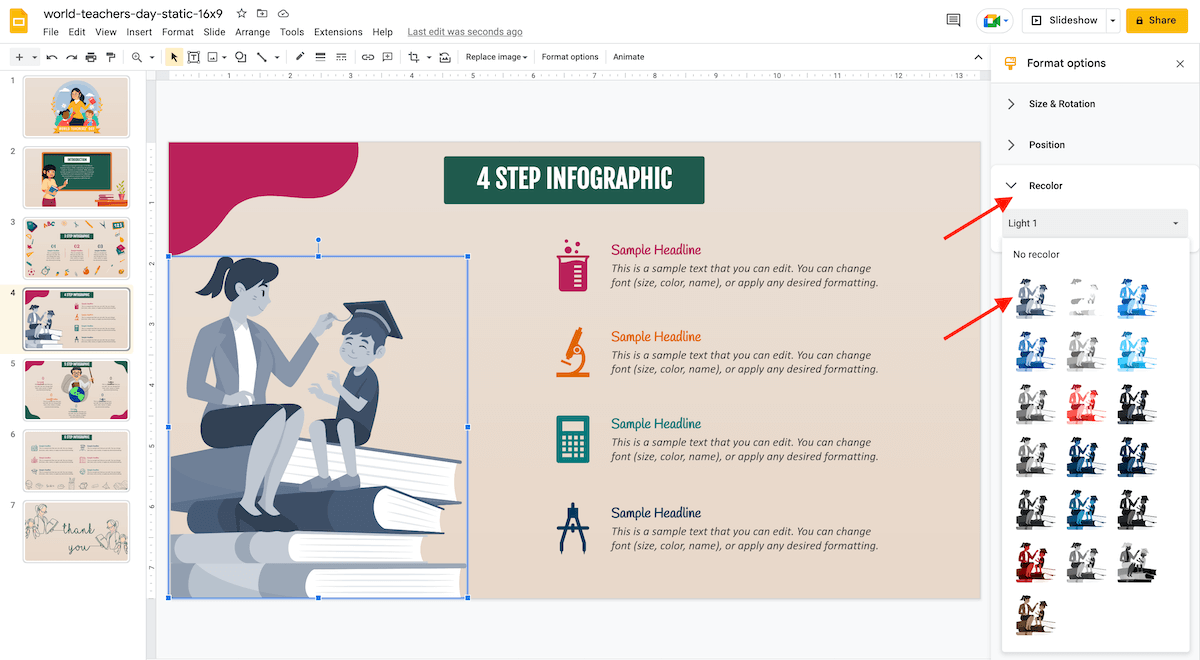
Step 2 – Go to Format options and click the Recolor tab.
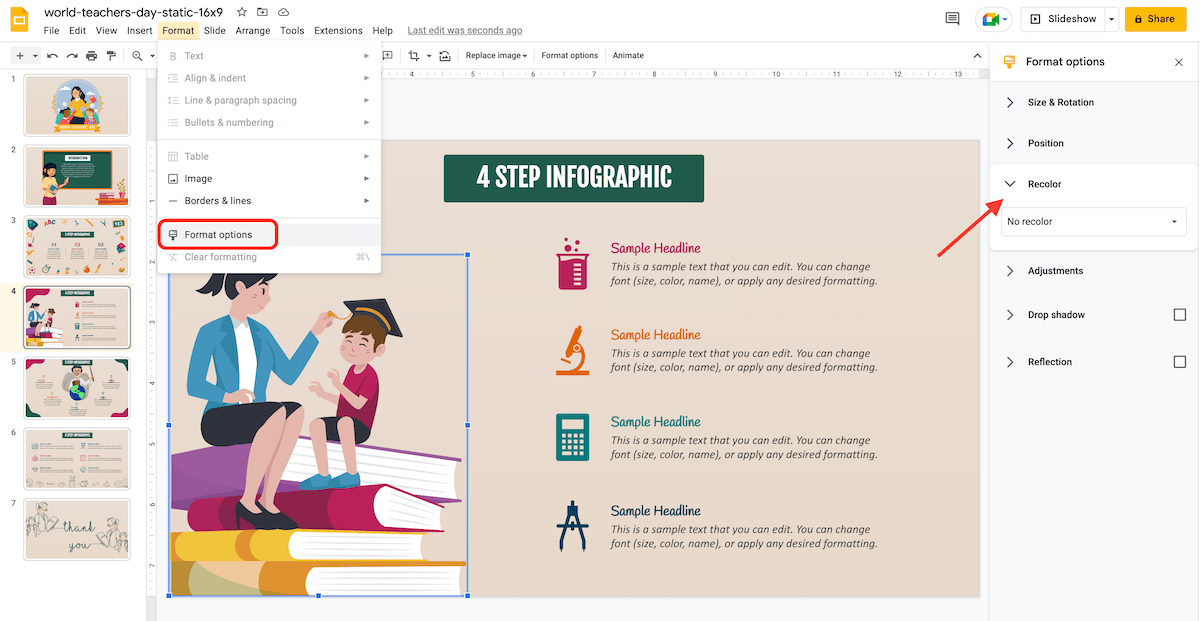
Step 3 – Now, choose your desired option. If you wish to revert an image to its original state, click “No recolor.”
Altering the Transparency of an Image
Step 1 – Head over to your Google Slides presentation and select the image you want to modify.
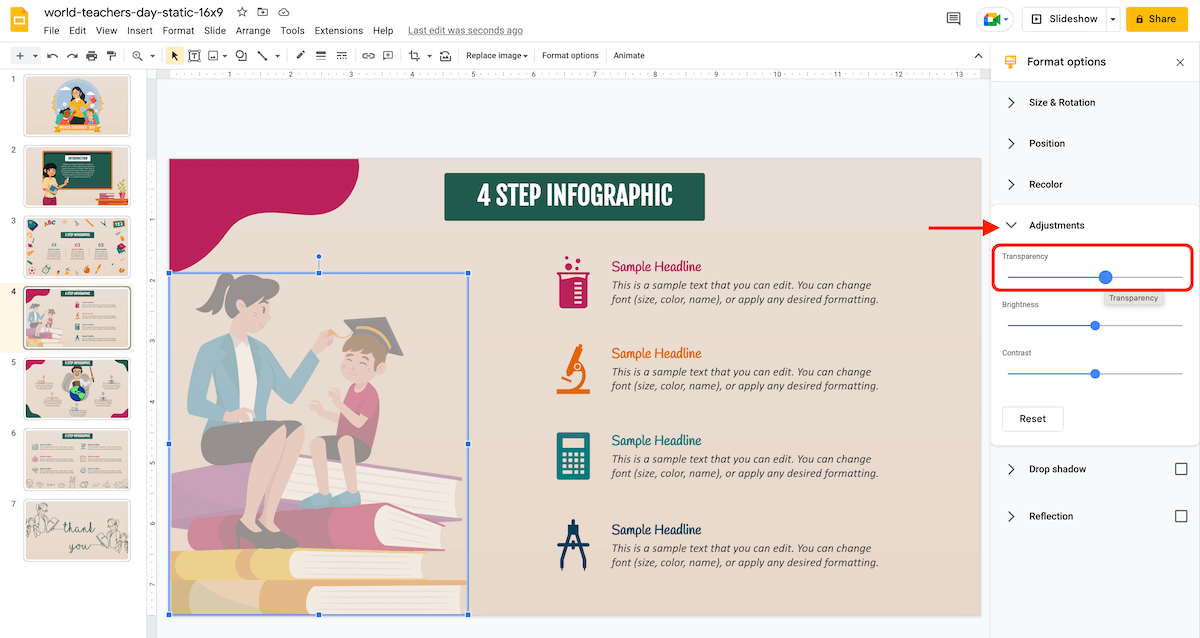
Step 2 – Go to Format options and click the Adjustments tab.
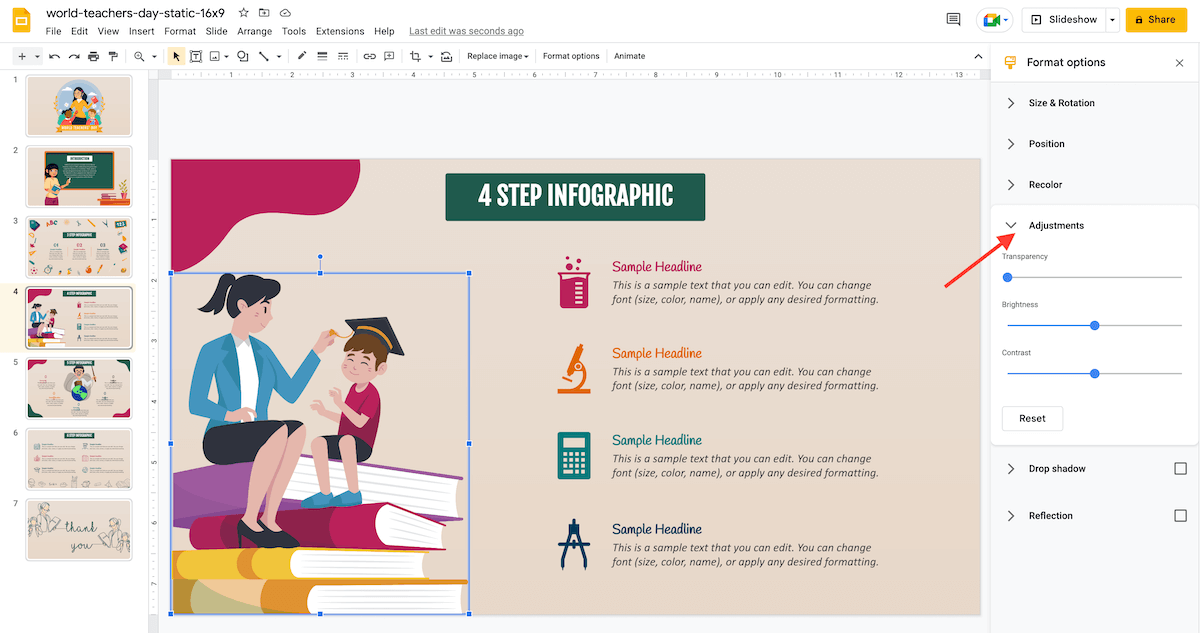
Step 3 – In the last step, you must click and drag the Transparency slider to adjust the transparency as required.
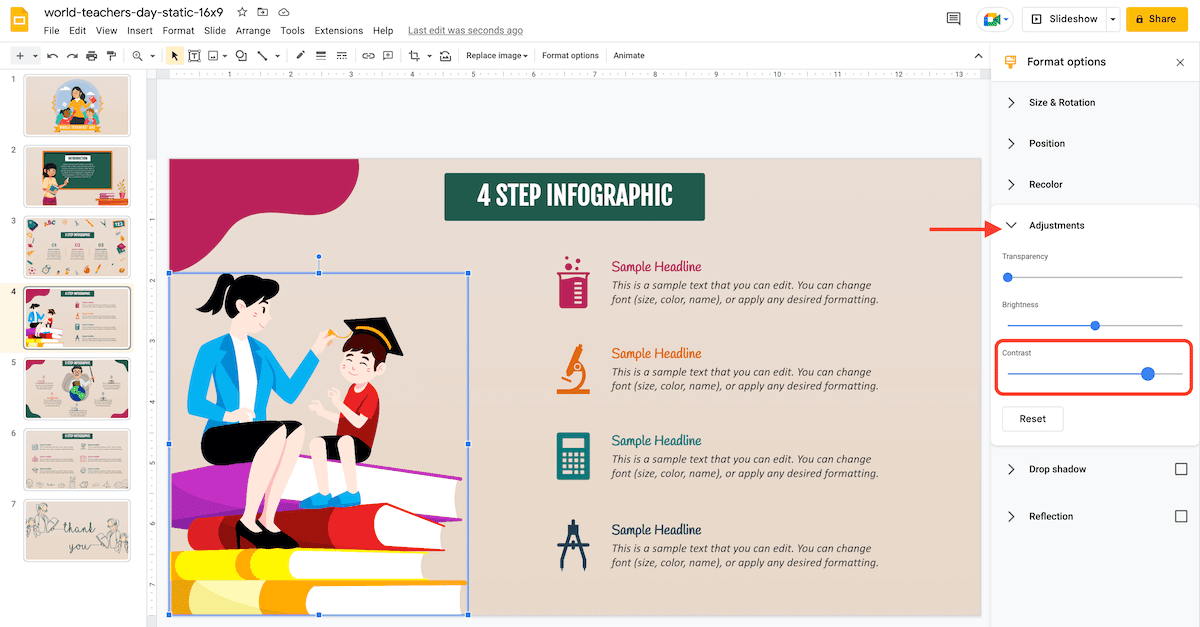
Changing the Contrast and Brightness of an Image
Step 1 – Head over to your Google Slides presentation and select the image you’d like to modify.
Step 2 – Go to Format options and click the Adjustments tab.
Step 3 – Click and drag the Brightness slider to adjust the brightness as required.
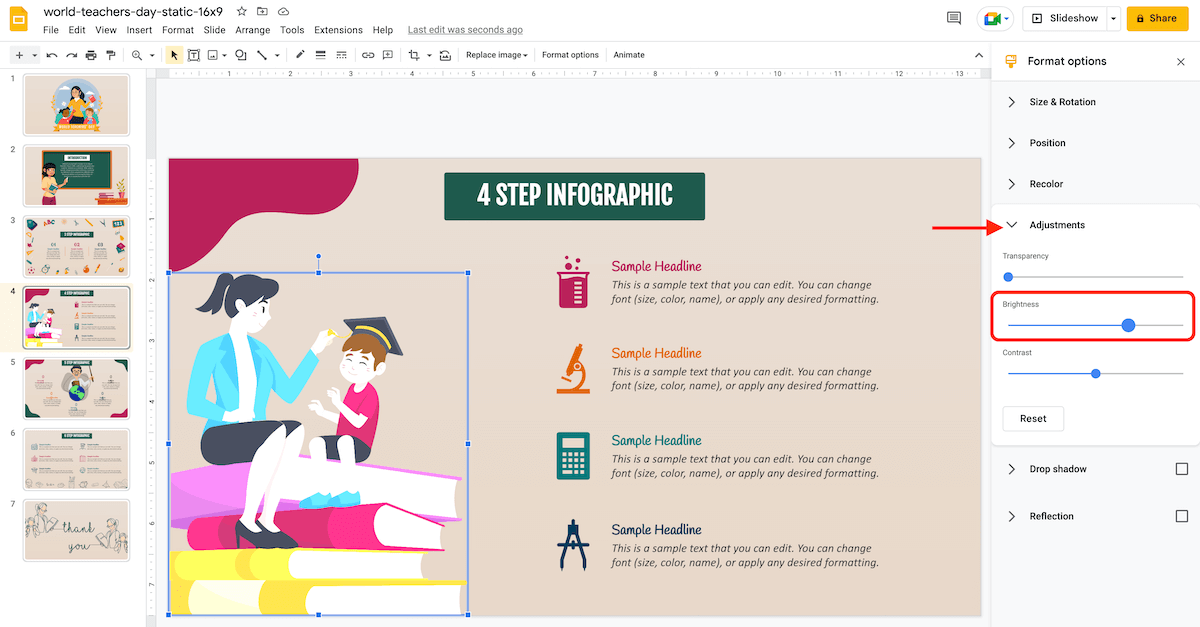
Step 4 – Click and drag the Contrast slider to adjust the contrast as required.
Adding a Shadow to an Image
Step 1 – Head over to your Google Slides presentation to select the image you’d like to modify.
Step 2 – Go to Format options and check the box provided against Drop shadow. After this, open the tab to adjust different settings related to the shadow.
Color – This option will let you select the color of the shadow.
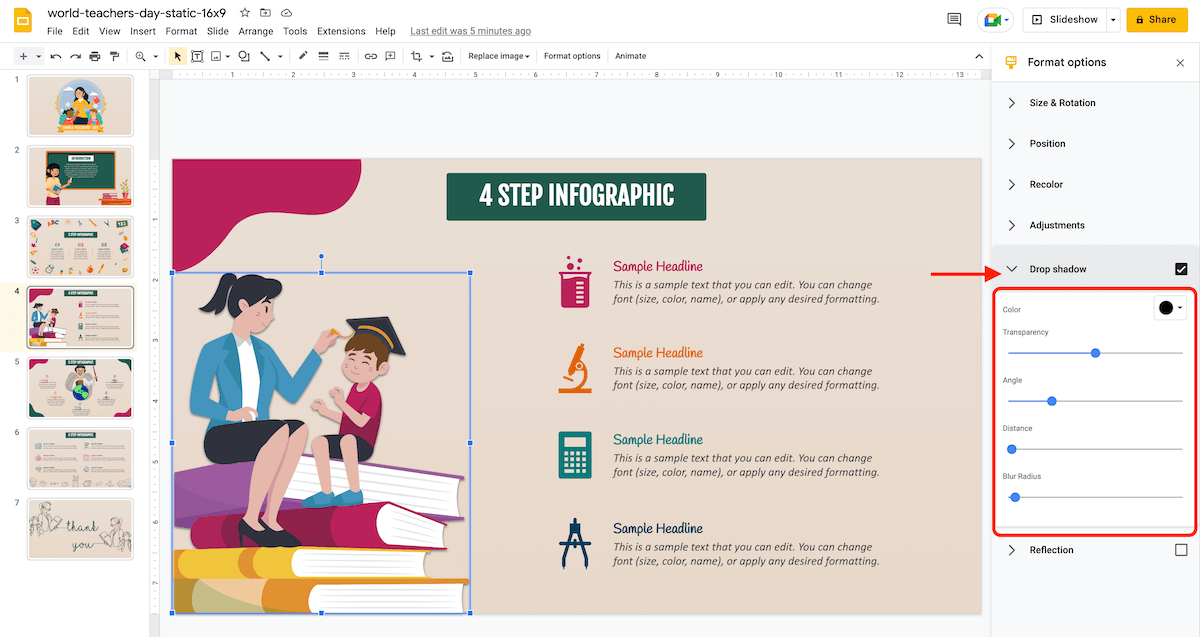
Transparency – Click and drag the slider to adjust the transparency as required.
Angle – This option will let you modify the angle from which the shadow is projected. Click and drag it.
Distance – This option will let you adjust the distance of the shadow. Click and drag it.
Blur Radius – You can click and drag the slider to adjust the blur radius of the shadow.
Adding a Reflection to an Image
Step 1 – Head over to your Google Slides presentation to select the image you’d like to modify.
Step 2 – Go to Format options and check the box provided against Reflection. After this, open the tab to adjust different settings related to the reflection.
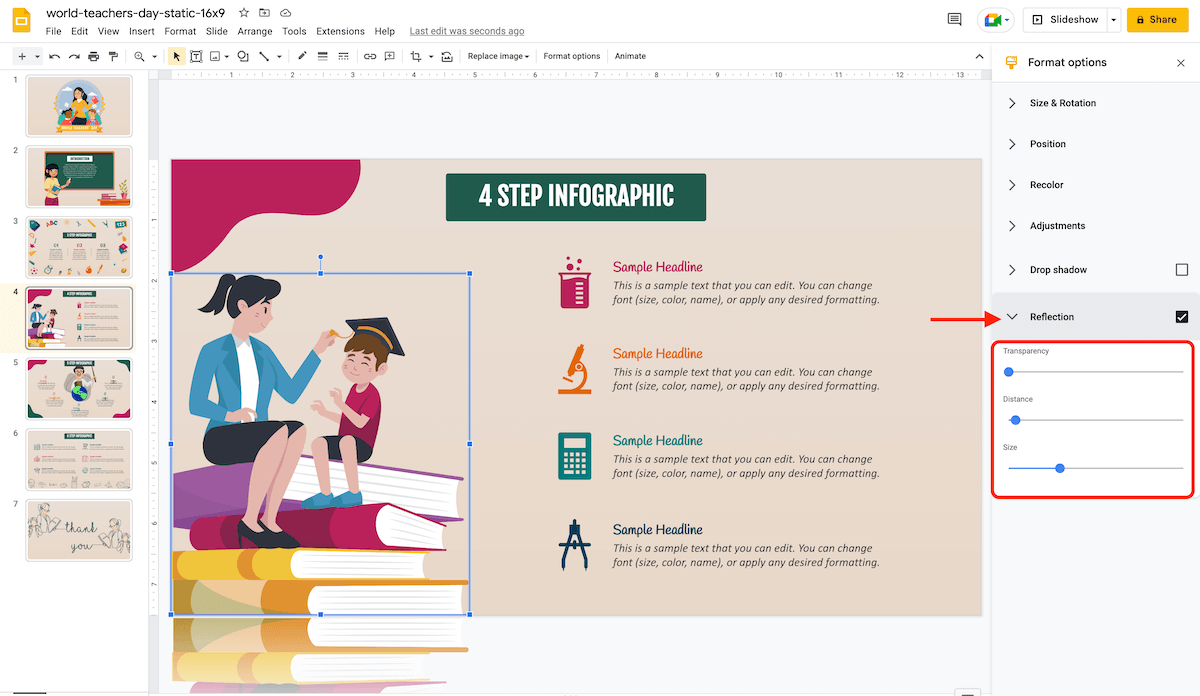
Transparency – Click and drag the slider to adjust the transparency levels as required.
Distance – This option will let you adjust the distance of the reflection. Click and drag it.
Size – Click and drag the slider to modify the size of the reflection.
Now that you understand how to apply effects to images in Google Slides, you possess at least one skill that will set your presentation apart and make a significant impact on your audience. If you liked the tutorial, let us know in the comments.