eBooks make the content easily digestible for the audience, increase leads over time, bring traffic to the website, and influence potential customers. Creating an eBook doesn’t have to be challenging. People with no creativity can also create eBooks and share them on their websites and social media pages. One of the best methods to create an eBook is by using Google Slides. By following this step-by-step guide, you can craft a professional eBook with Google Slides.
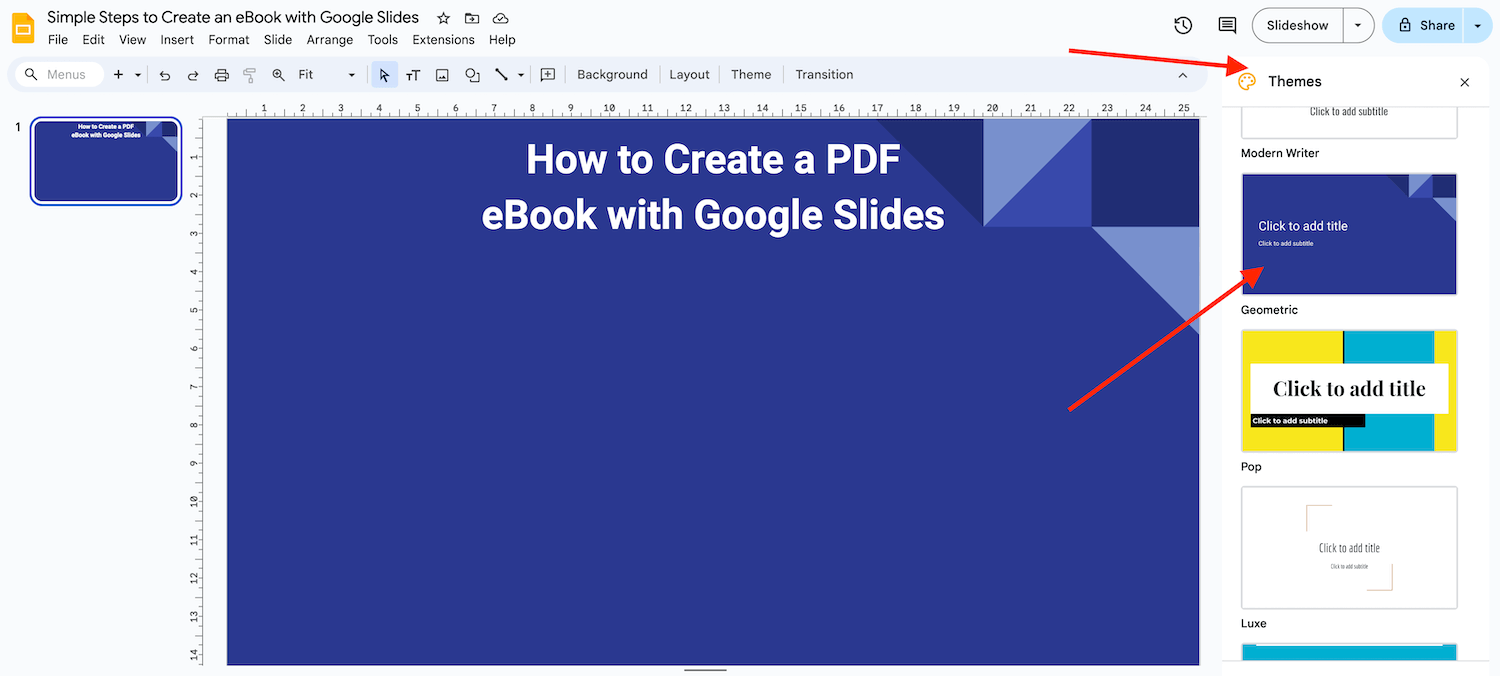
Pick an in-built eBook Template or Create Your Own
Select a template according to your requirements from the tons of readymade template designs available in the Google Slides library.
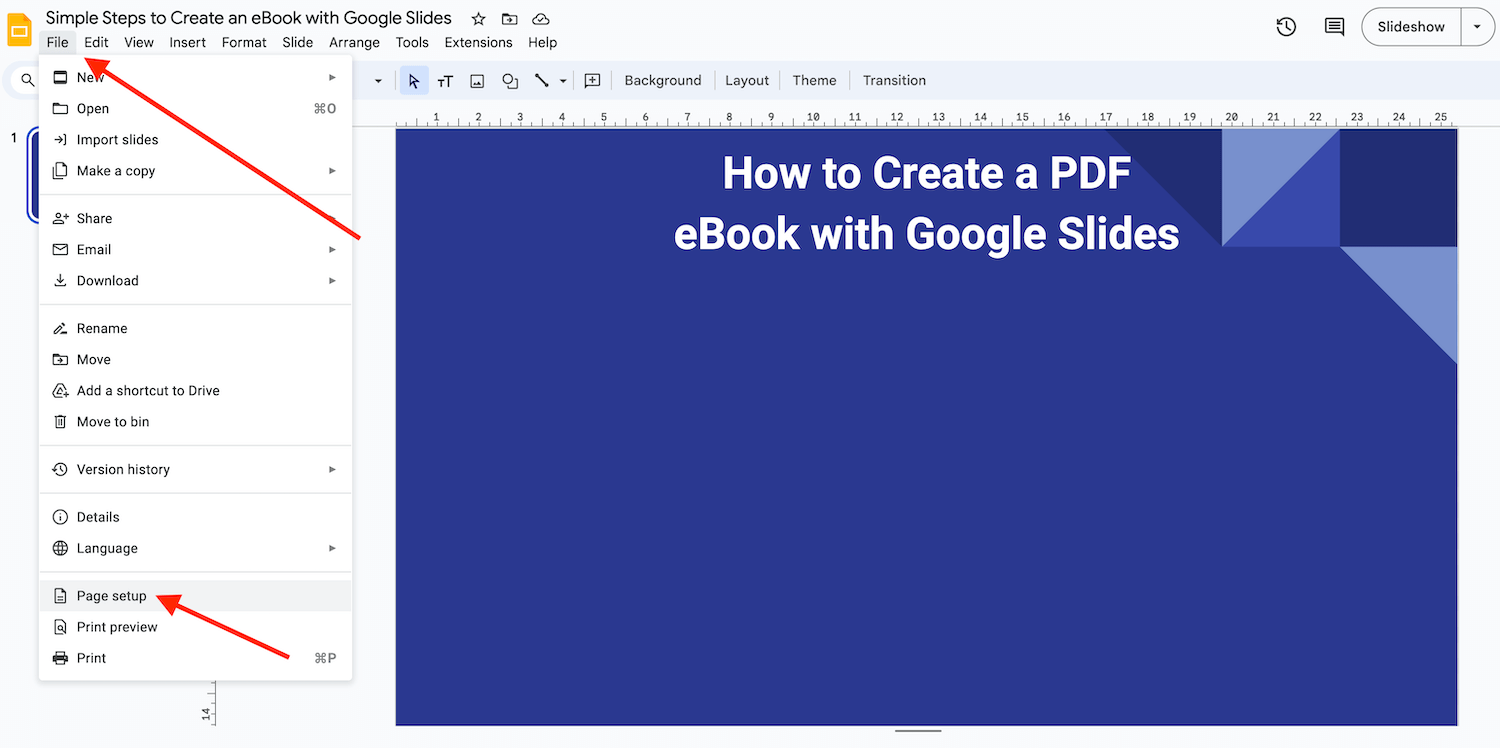
Customize the Slides to Fit your eBook’s Dimensions
- Resize the slides of the selected template.
- Choose the design from portrait and landscape.
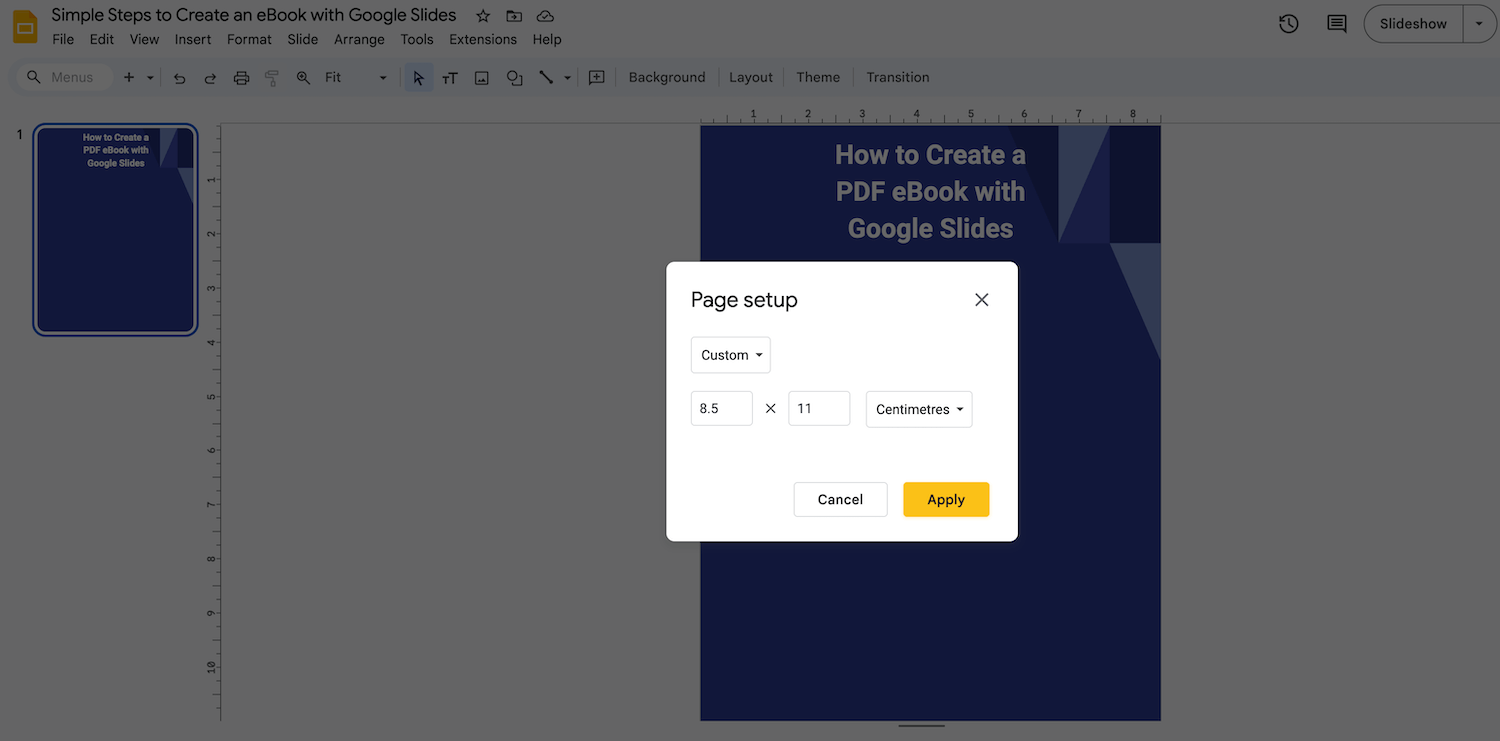
- The standard size of an eBook is 8.5 by 11 so that people can easily download and print it.
- Select File > Page Setup. From the drop-down box, select Custom to input your dimensions.
Fill your Content, Graphics, and Images in the eBook
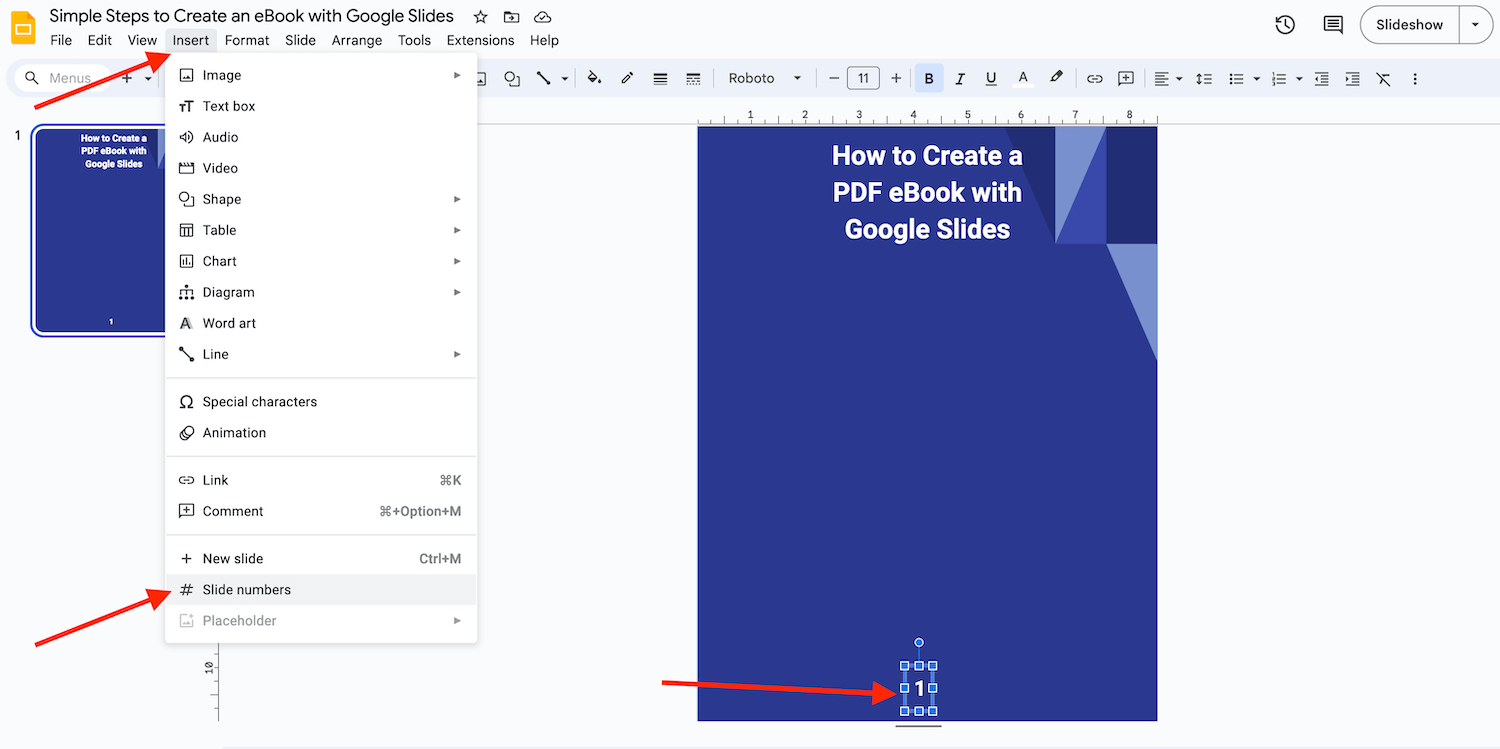
Create a cover page, header, and footer with title and page numbers. If you choose a readymade template, it will come with different transition pages that will help you break up the content without putting much effort into the design.
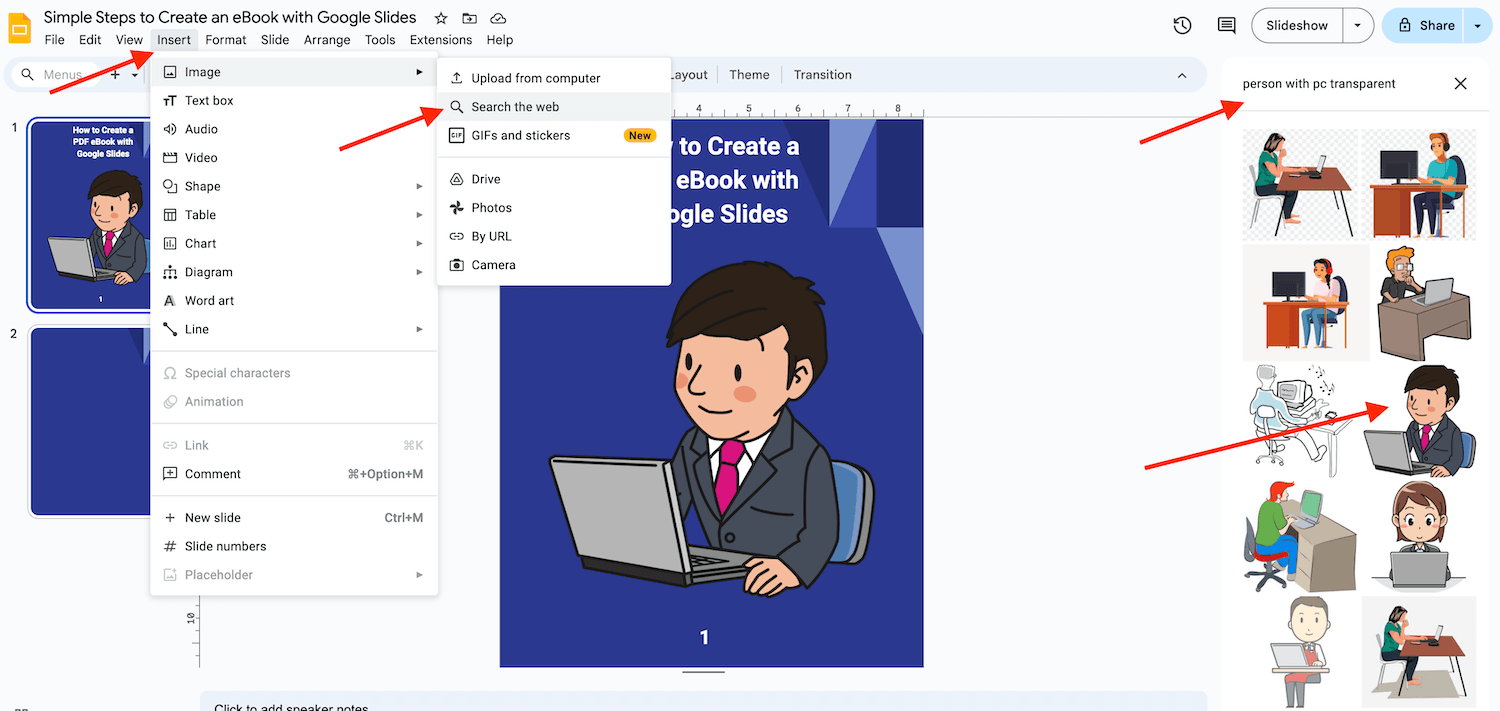
Once you complete adding the content to each page, add relevant images, graphics, and other elements. Also, you can modify the color scheme to fit your requirements better.
You can choose stock photos or those stored in your library that complement your content. To update the background image, select the background image, delete it, then select Insert > Image and click on the uploaded image. Resize and crop it to fit it to your slide.
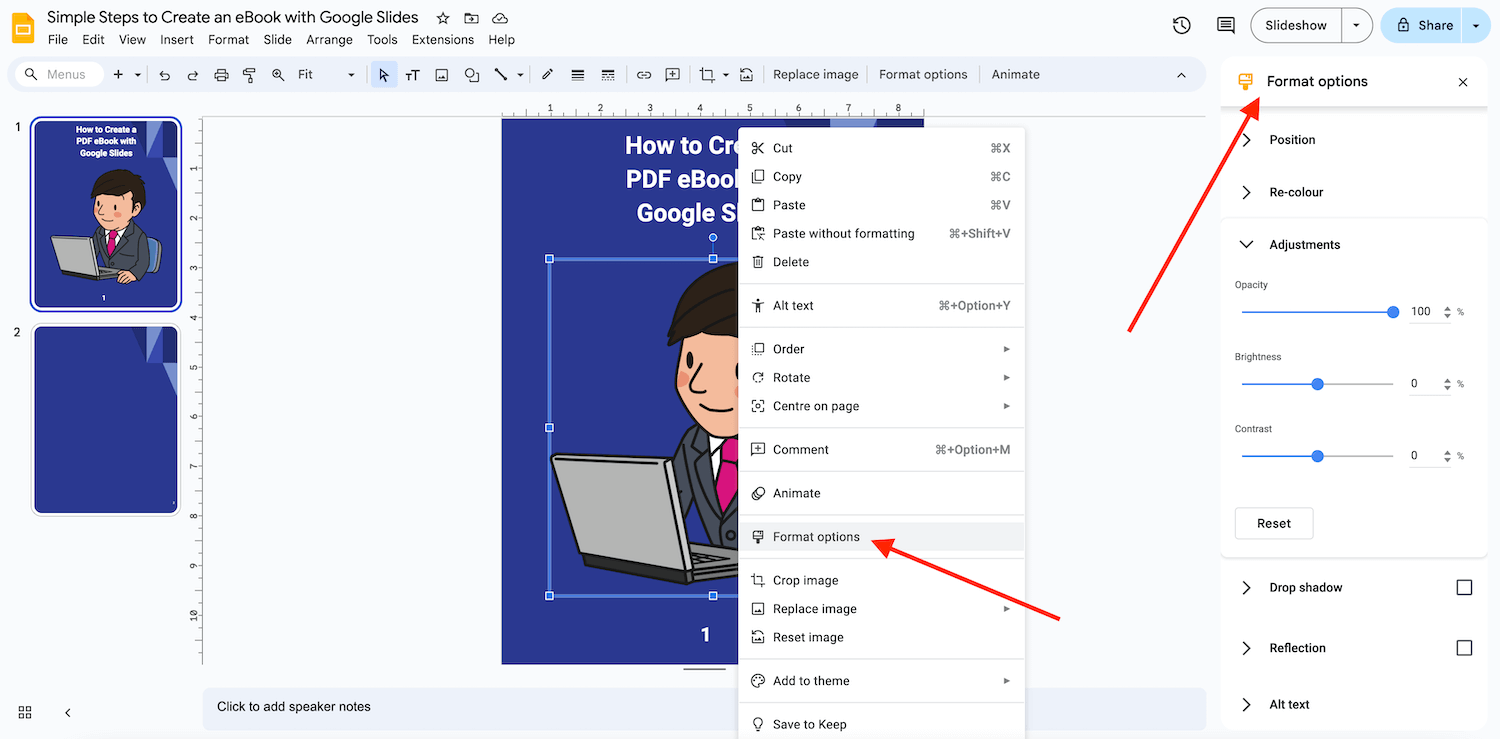
You can update the coloration and transparency by moving the scale in the ‘Image Options’ to ensure the content is visible.
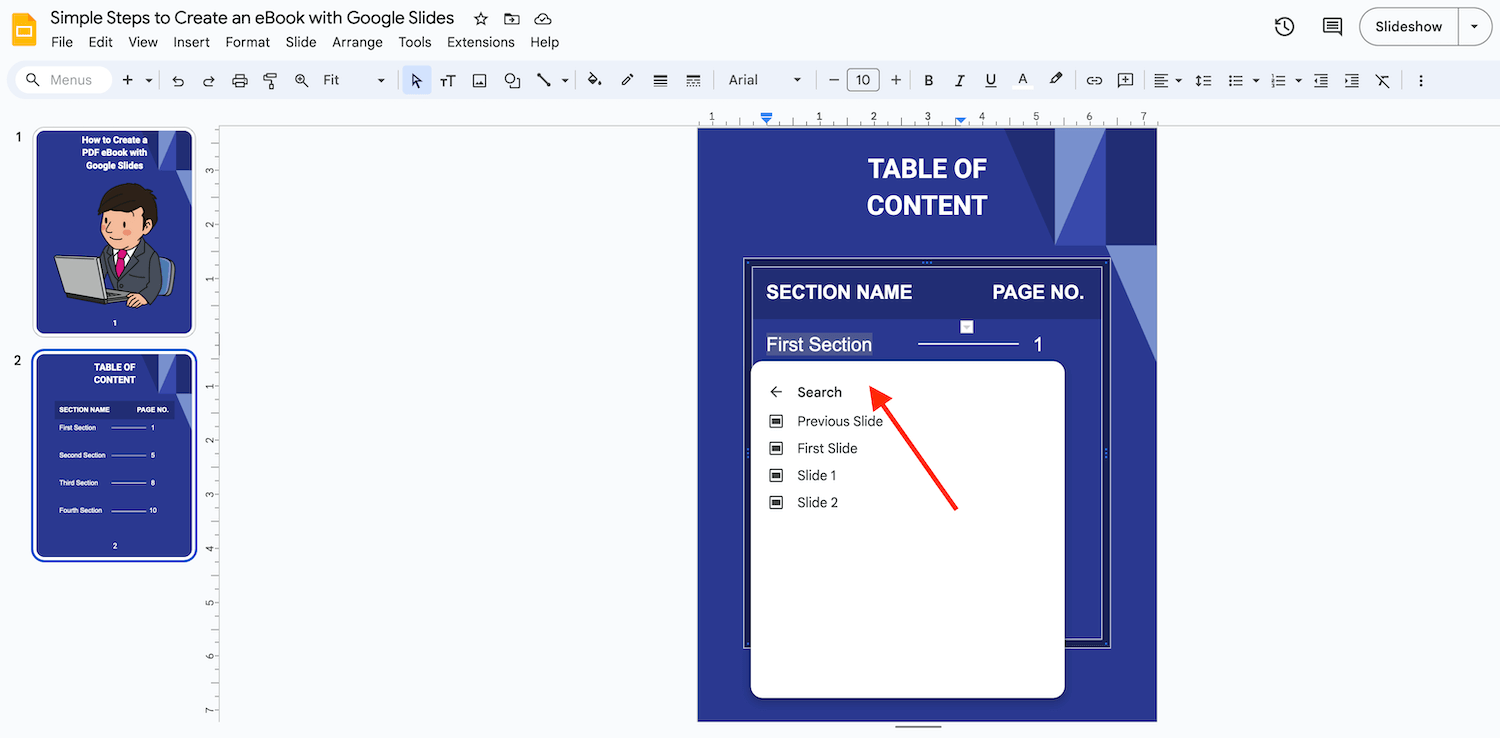
Creating Table of Contents
- Go to Table > Insert Table and insert a 2 x X table, where X is the number of your items.
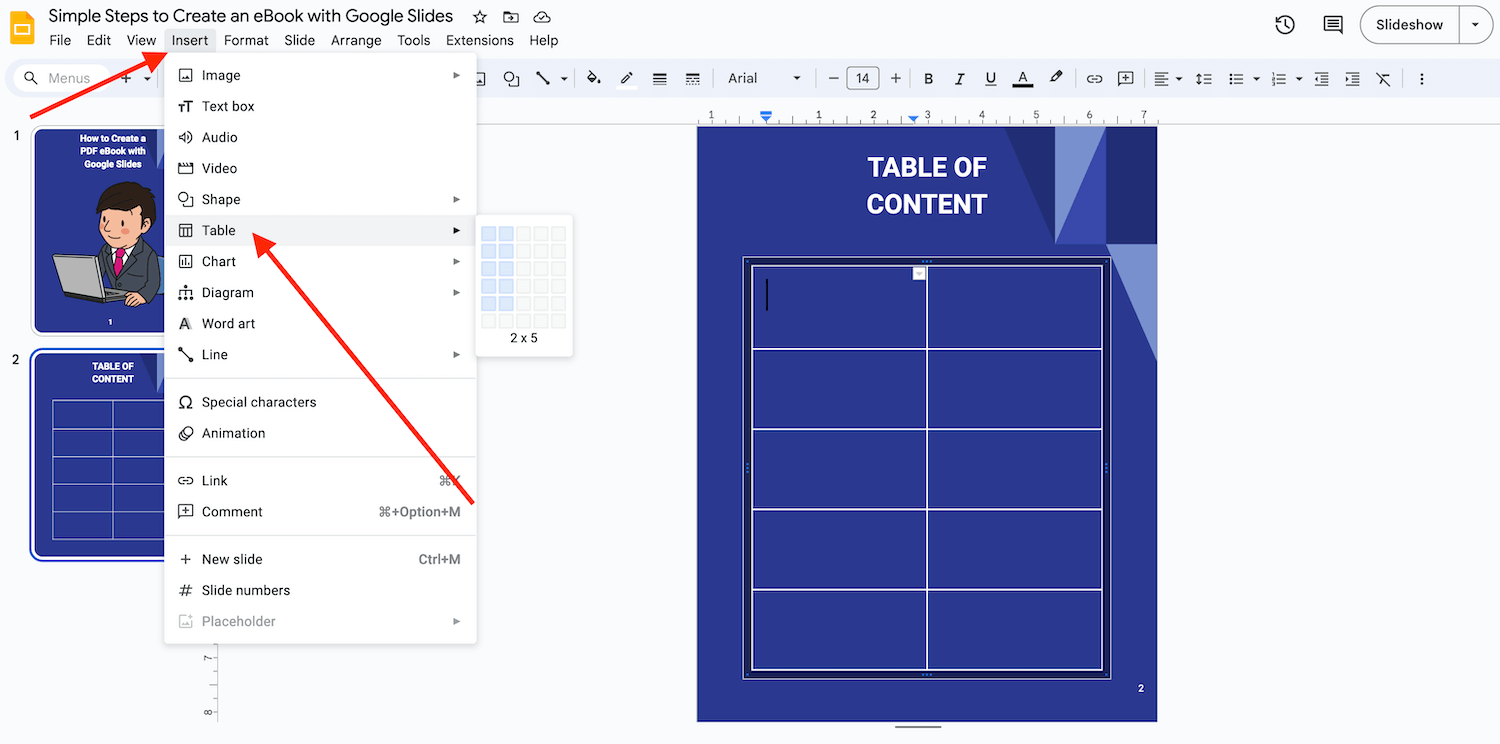
- Write down the titles in the left and the page numbers in the right cells. Right align the page numbers in the right cells.
- Select the entire table and change the Line Color to Transparent.
- Select Line Tool to draw a straight line between title and number while holding the Shift key. Change the Line Dash to Dotted.

- Select the chapter title and press Ctrl + K to insert a link of the respective slide.

Arranging Objects
- Select all objects by holding the Shift key. Alternatively, press and hold the left click of the mouse and drag over the objects.
- To group, select Arrange > Group.
- To align, Arrange > Align horizontally or Arrange > Align Vertically.
- To distribute, Arrange > Distribute.
- To center, Arrange > center on the page.
- To change the order, Arrange > Order.
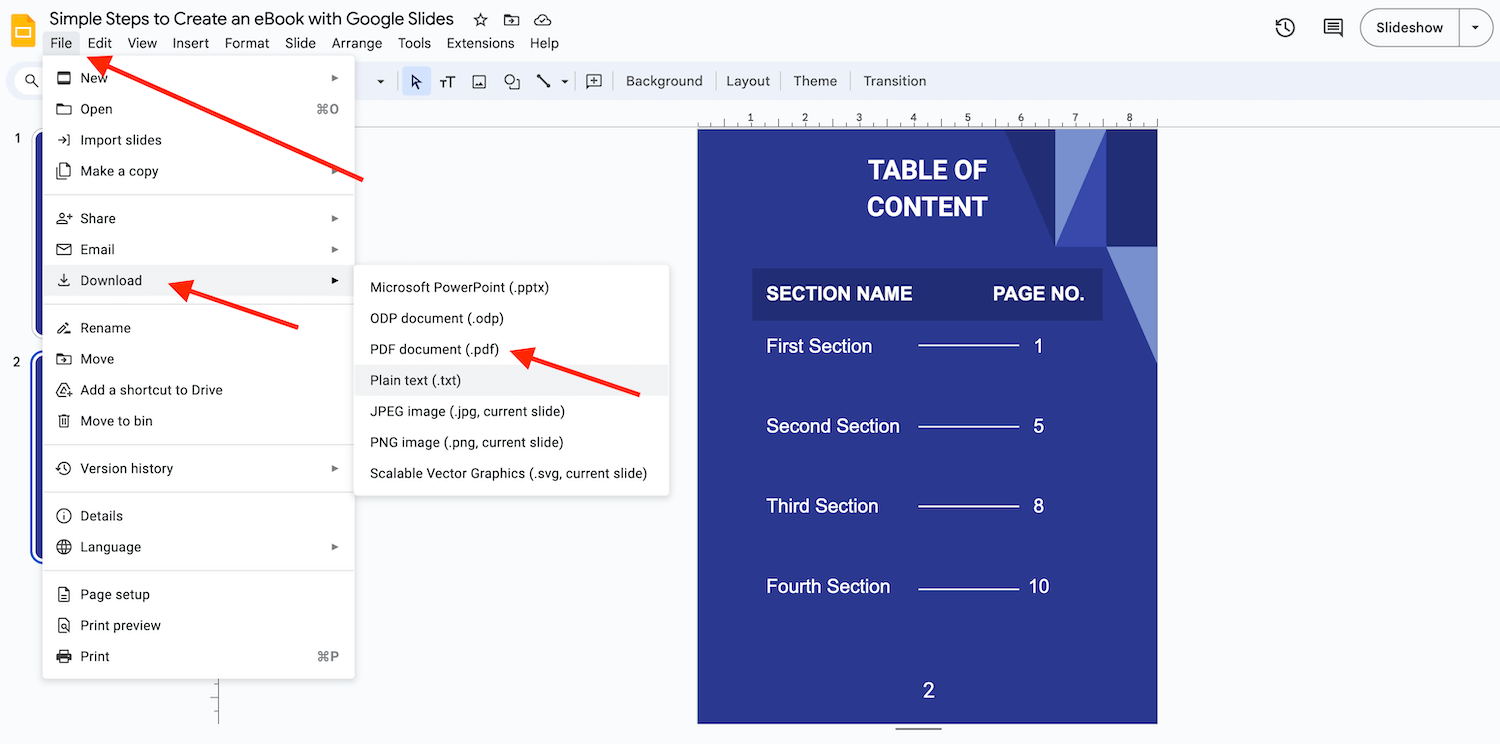
Download as PDF
Once you complete your eBook, convert or download it as a PDF by clicking File > Download as > PDF. Save it in the desired folder and share it anywhere, and you can also upload it to your Google Drive. You can paste the eBook link stored in the drive to your website, blog, or other promotional or marketing materials.
This tutorial taught you the easiest way to create an eBook with Google Slides! Stay in touch for more helpful guides!

